> For the complete documentation index, see [llms.txt](https://nxp.gitbook.io/mr-canhubk344/llms.txt). Markdown versions of documentation pages are available by appending `.md` to page URLs; this page is available as [Markdown](https://nxp.gitbook.io/mr-canhubk344/getting-started/connecting-a-debugger.md).

# Connecting a debugger

## Connecting a debugger

Mobile Robotics boards typically include a DroneCode standard programming adapter to connect to your MR-CANHUBK344. The kit (depending on version)  omes with a DCD-LZ breakout board. This port combines the SWD and debug console UART into a single connector.&#x20;

{% hint style="success" %}
The MCU-LINK-MR can be used in place of a JLINK and it also includes this same DCD-LZ  (UART+SWD) connection integrated with a low cost debugger.

The UART is generally used as a debugging console for RTOS' like Zephyr or PX4.
{% endhint %}

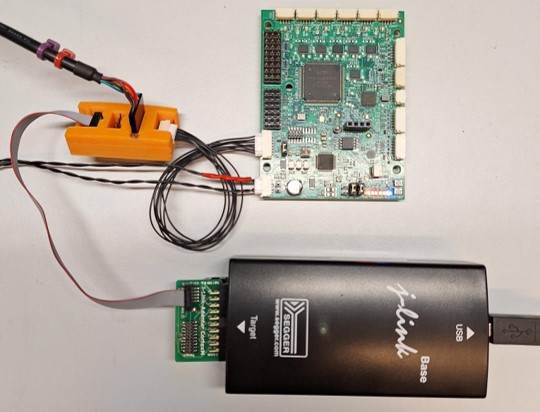
The image below displays how the debugger can be connected.  The first image shows the DCD-LZ breakout board which combines the programming and a console UART into one connector.\
The second shows an alternative way of connecting a programmer via a standard 10 pin JTAG/SWD header.

<figure><img src="/files/JBzsAtOCNHP9R1ITitmB" alt=""><figcaption><p>How to connect the programmer to the MR-CANHUBK3 using DCD-LZ adapter and DCD-LZ port</p></figcaption></figure>

<figure><img src="/files/hNYfZ3BqSEGTTIfRE852" alt=""><figcaption><p>Alternative programming connector without DCD-LZ. Direct connection of JLINK to standard JTAG/SWD header.</p></figcaption></figure>
